
Your iPhone can shoot cinematic video, edit photos with a tap, and organize thousands of memories by face yet when it comes to how to make a collage on iPhone, things suddenly feel less obvious. There’s no big “Create Collage” button waiting for you inside the Photos app. It’s almost like Apple expects you to already know the trick.
What to do when you have so many vacation pictures and want to make a collage? How to create a before and after comparison in the same picture? Apple doesn’t give you the answer so easily. No, don’t worry. You don’t need advanced editing skills to make a collage. The tools are already there, tucked quietly inside apps you probably use every day.
If you are tired of searching for collage makers online, you have arrived at the right place. we’ll walk through three simple ways to create a collage on your iPhone, including a method using the Blend app that works in seconds.
Method 1: How to Make a Collage Using Shortcuts on iPhone
'If you want to make a collage on your iPhone without installing a third-party app, you can use the built-in Shortcuts app — available on iOS 13 and later, and fully compatible with iOS 18 and iOS 26 in 2026.
While some versions may show a ready-made Photo Grid on iPhone shortcut in the Gallery tab, it isn’t guaranteed for every user. If you don’t see it, you can create your own in under a minute:
- Open the Shortcuts app.
- Tap the + button in the top-right corner to create a new shortcut.
- Tap Add Action, search for Select Photos, and turn on Select Multiple.
- Tap Add Action, search for Combine Images, and choose the Grid option.
- Tap Add Action, search for Save to Photo Album, and select it.
- Tap the Play (▶️) button to run the shortcut.
- Select the photos you want to include.
The shortcut will automatically create a grid-style collage and save it to your Photos app. This is one of the ways to make collage on iPhone without app.
Method 2: How to Make a Collage on iPhone with Blend
First, download the Blend app on iPhone. It’s an AI tool that helps businesses, creators, and online sellers make high-quality images and videos quickly. The best part about this app is that you don’t need complicated design software or professional photoshoots to build and sustain your brand anymore.
Step 1: Tap the Try Button in Collage
Start by opening the Blend app and navigating to the Collage section. You will see a preview screen showcasing collage styles along with a prominent “Try” button.
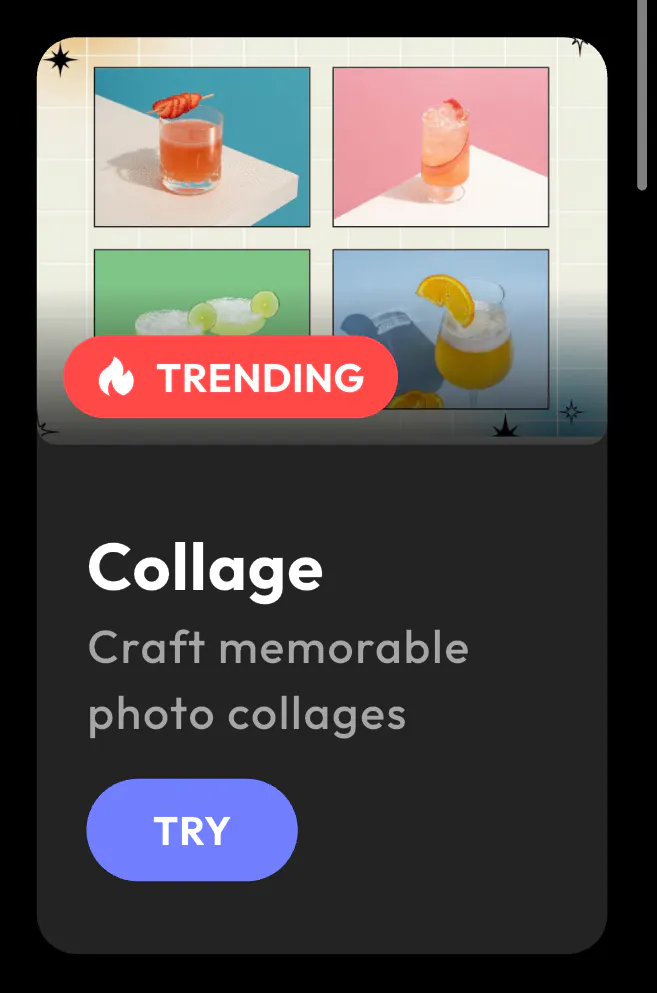
Tap Try to begin creating your collage. This takes you directly into Blend’s collage editor, where you can explore templates and start customizing your design. No setup, no complicated menus. Just one tap to get started.
Step 2: Explore the Countless Collage Templates
Once you are inside, you will enter a gallery filled with professionally designed collage options.


Blend offers a wide variety of categories, including:
- Flat Lay Collages
- Product Collages
- Studio Collages
- Film-style layouts
- Skincare Collages
- Fashion Collages
You can scroll through countless templates, search for specific styles, or filter based on your needs. Whether you’re creating content for social media, e-commerce, or personal memories, there’s a layout ready to use.
Now you are ready to choose the template that fits your vision.
Pro Tip: Before picking a template, decide how many photos you want to include. Blend allows you to create collages with 2, 3, 4, or more pictures depending on the layout. When you choose the number of images first, it helps you quickly find the right template and keeps your collage clean and well-balanced.
Step 3: Create Your Collage
Once you’ve selected your template, it’s time to add your photos. Tap on any “+ Add” placeholder inside the layout to upload images from your gallery. You can fill each section one by one and instantly see your collage come to life.
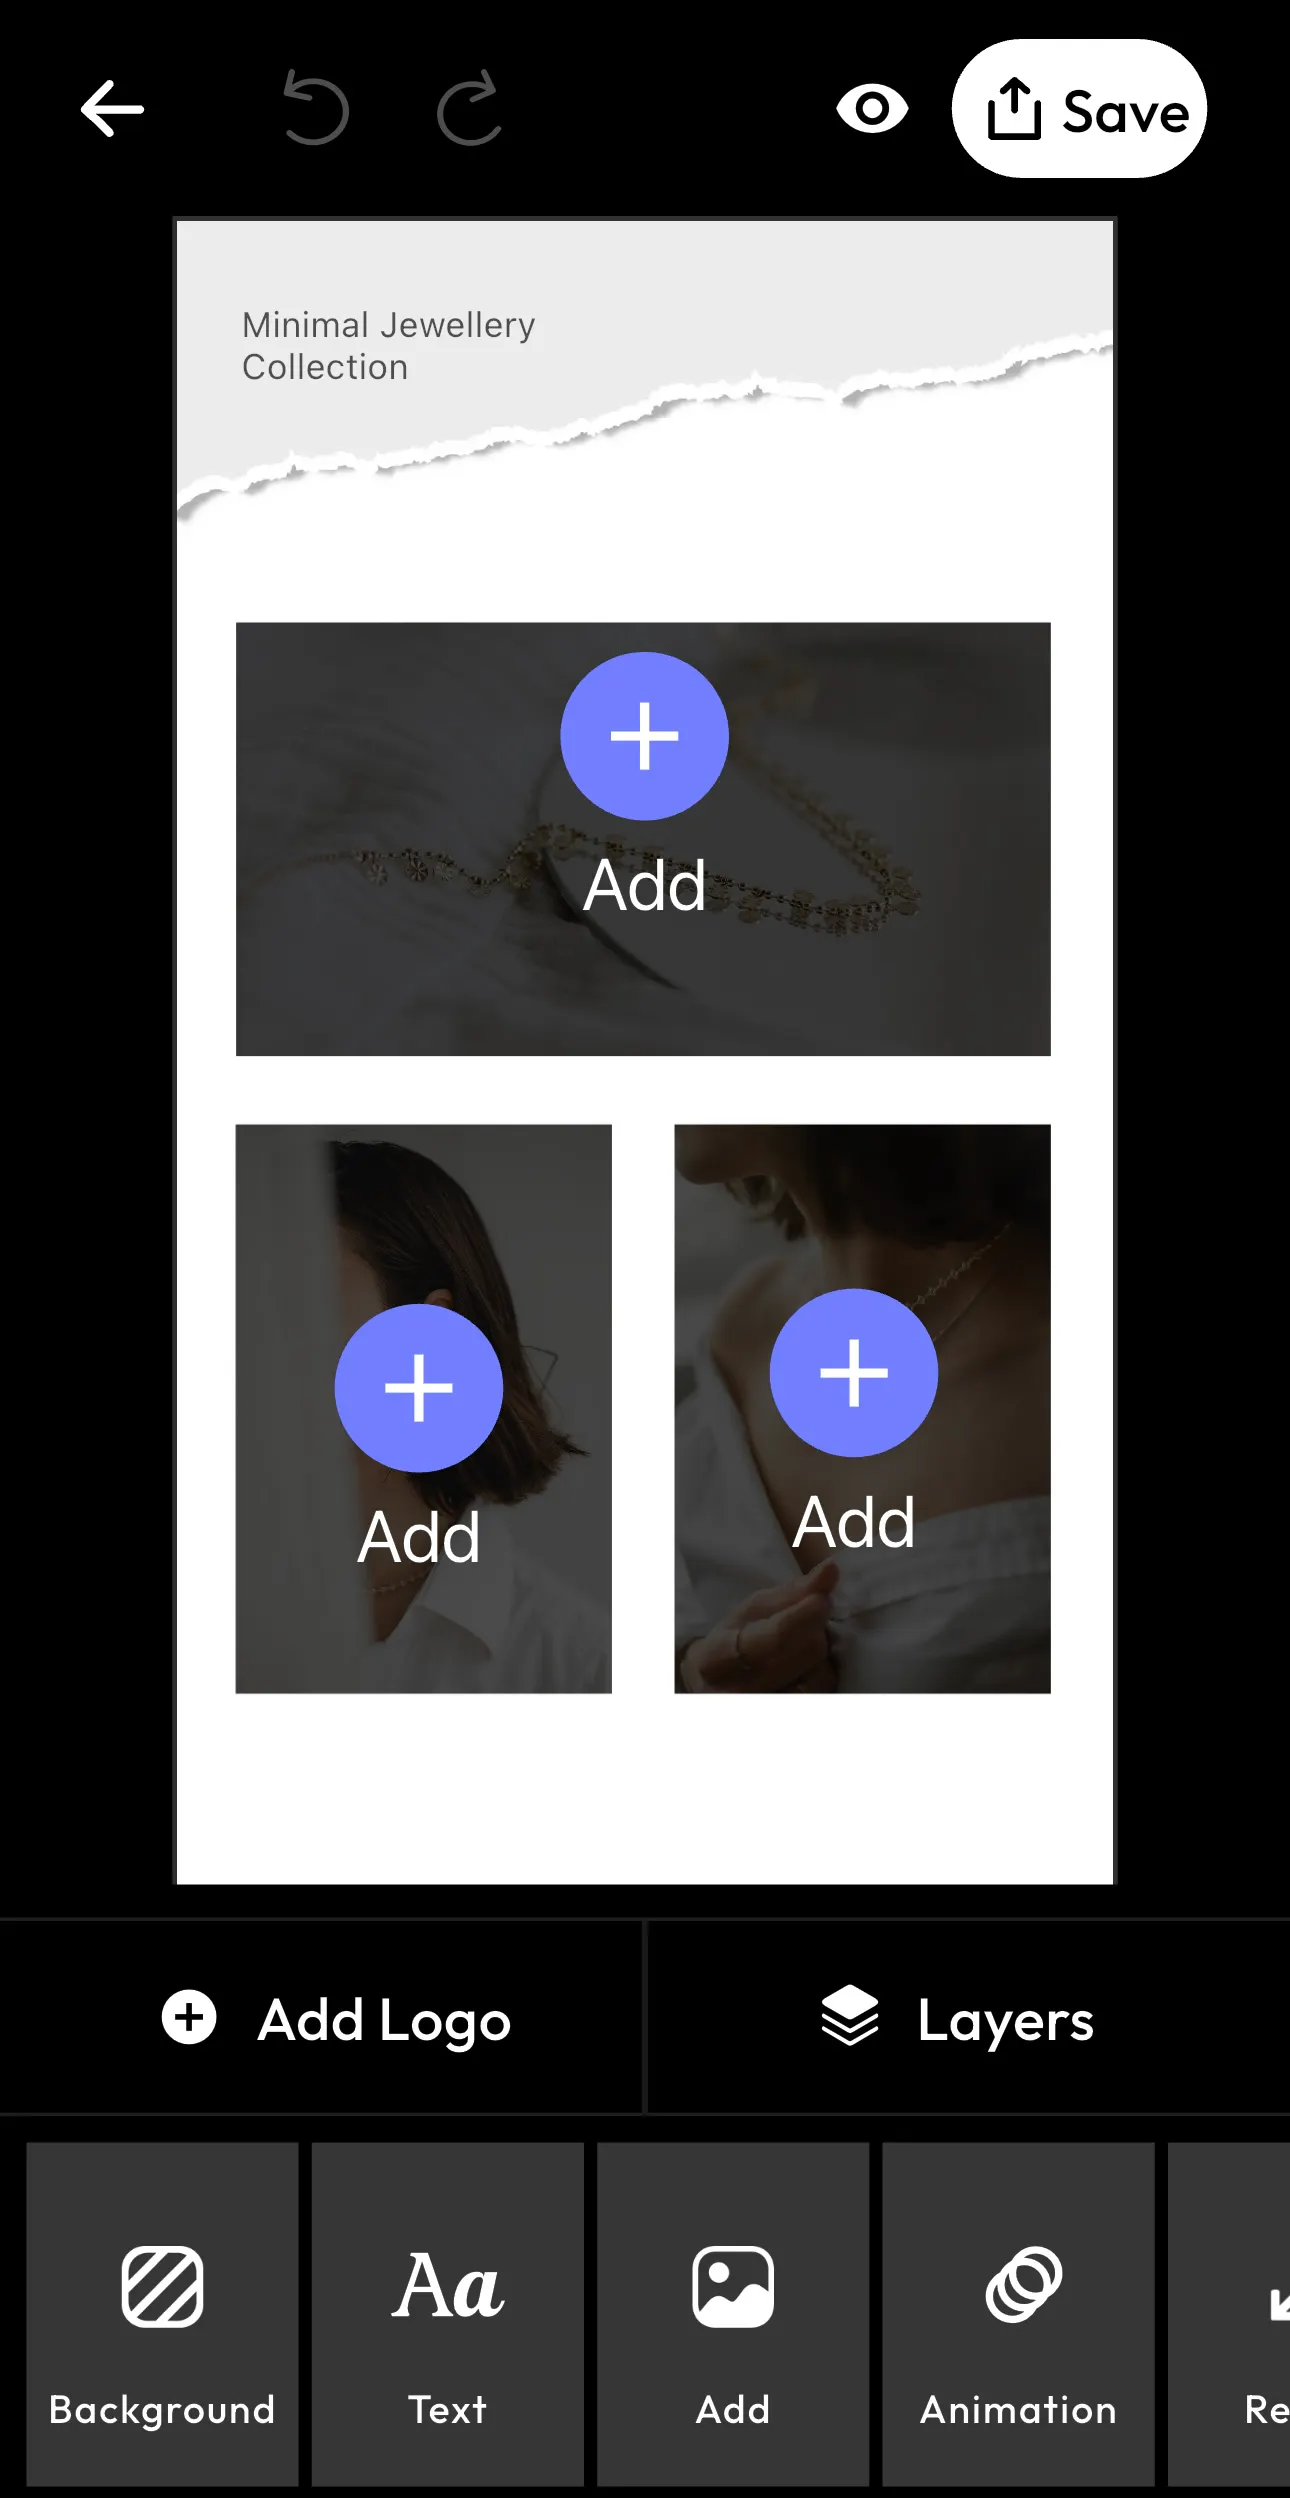
After adding your pictures, you can customize everything:
- Adjust positioning
- Edit text
- Change backgrounds
- Add your logo
- Explore layers
- Apply animations
- Resize l the design to fit different platforms
When you are done and happy with the final look, tap Save in the top right corner to download or share your collage.
Step 4: Customize Your Collage
When you select the “+ Add” button and insert your photo into the collage, Blend unlocks a full set of editing tools at the bottom of the screen. Here’s what each option lets you do:
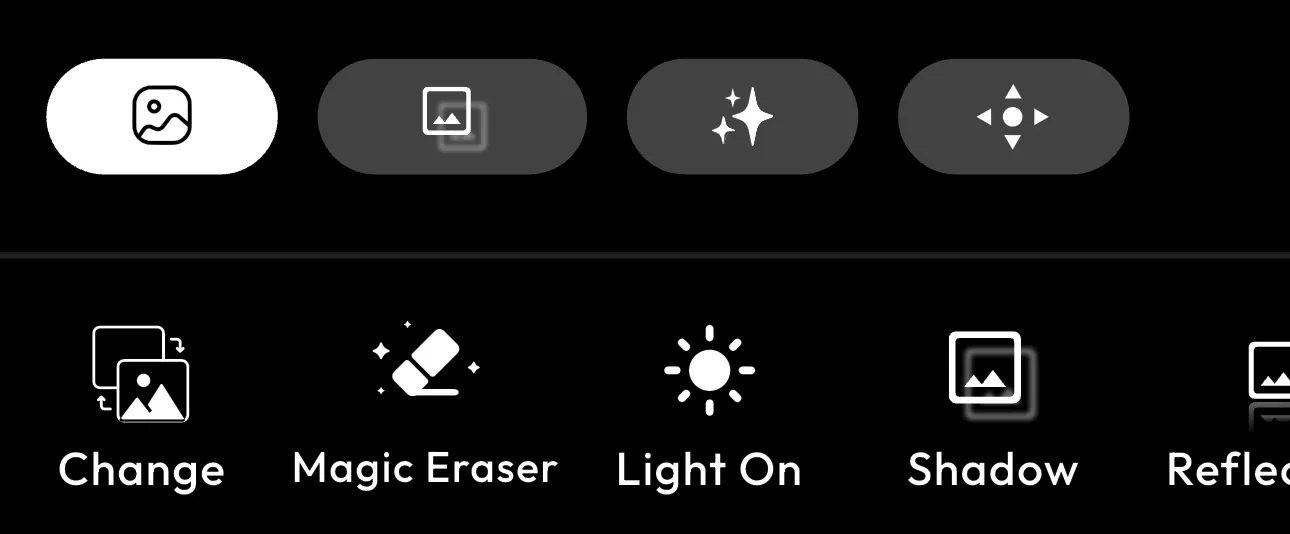
Change: Replace the current image with a different one from your gallery without deleting the layout.
Magic Eraser: Remove unwanted objects or distractions from your photo instantly using AI.
Light On: Enhance lighting and brightness to make your image look clearer and more professional.
Shadow: Add realistic shadows to give your collage more depth and dimension.
Reflection: Create a reflection effect for a sleek, studio-style finish.
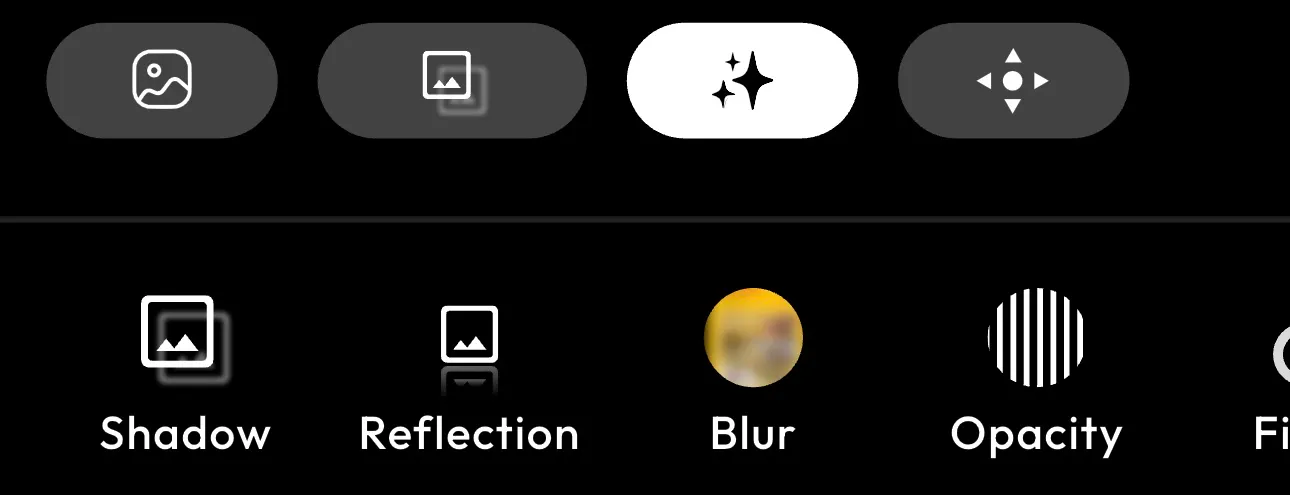
Blur: Soften parts of the image for a subtle background effect.
Opacity: Adjust transparency to blend images smoothly into the design.
Filters: Apply preset color tones to match your brand aesthetic.
Adjust: Fine-tune brightness, contrast, saturation, and more.
Perspective: Correct angles or slightly tilt the image for a dynamic look.
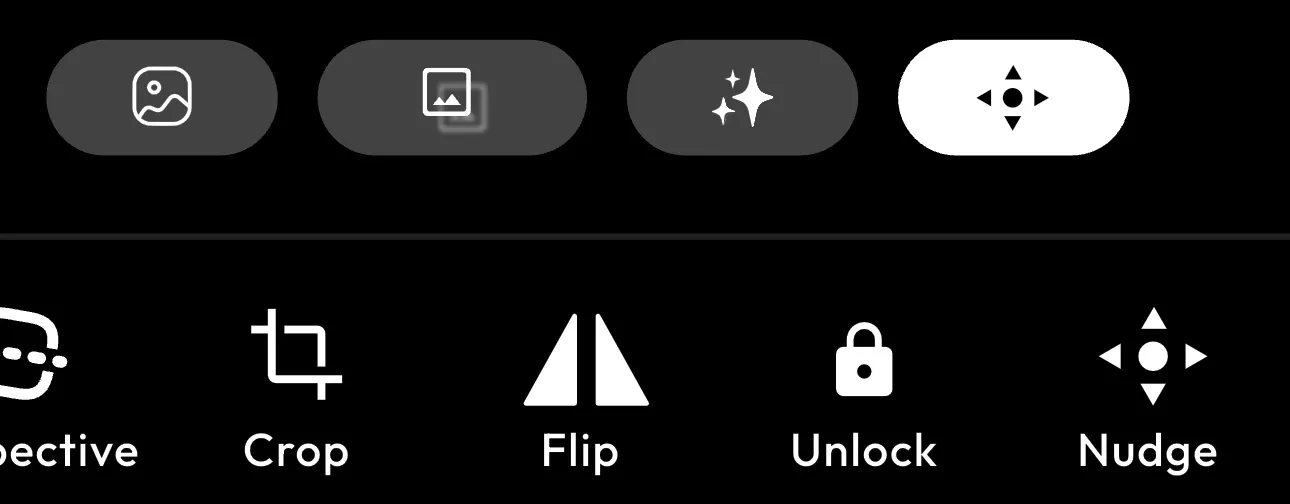
Crop: Trim your image to fit perfectly inside the frame.
Flip: Flip the image horizontally or vertically.
Unlock: Free the image from its fixed position so you can move it more freely.
Nudge: Make precise position adjustments for perfect alignment.
These tools give you complete control to refine your collage and make it look polished and professional before hitting the “Save” button.
Unlike other simple collage makers and AI tools that only create a photo grid on iPhone, Blend offers advanced editing like background removal, Magic Eraser, filters, blur, and lighting adjustments. It’s an all-in-one app that can do anything you want. Blend gives you professional templates and full creative control. In simple words, the Blend app is more powerful than a typical iPhone collage maker.
Take a look at some of the collages I’ve made using Blend:


Method 3: How to Make a Collage on iPhone Using Instagram Layout
This is a common way of making a collage especially if it’s for social media usage. Here’s how you can use the Instagram Layout and create a collage:
- Open the Instagram app.
- Tap Your Story at the top left.
- Swipe through the camera modes at the bottom until you see Layout.
- Choose your preferred grid format (2, 3, 4, or more sections).
- Add photos from your gallery or take new ones.
- Adjust positioning and post to your Story.
You can also use Instagram’s separate Layout app (if available in your region), but most users won’t need it because the feature is built directly into Stories.
How to Make a Collage on iPhone Without Downloading an App
Method 1: Using the Photo Grid Shortcut (No Download Required)
Your iPhone's built-in Shortcuts app includes a ready-made Photo Grid shortcut — no third-party download needed. Here's how:
a. Open the Shortcuts app on your iPhone.
b. Tap the Gallery tab at the bottom of the screen.
c. In the search bar, type Grid (not 'Photo Grid') — this is the most reliable search term.
d. Tap the + icon on the Photo Grid result to add it to your library.
e. Go to the Shortcuts tab and tap Photo Grid to run it.
f. Select 2–9 photos from your camera roll, then tap Add.
g. Wait a few seconds for the collage to generate automatically.
h. Tap the Share icon and select Save Image to save to your Photos app.
Tip — Change Layout (Vertical, Horizontal, or Grid):
Tap the three dots (•••) on the Photo Grid shortcut → scroll to the layout action → tap to switch between Vertical, Horizontal, or In a Grid → tap Done.
Method 2: Using the Freeform App (iOS 16.2+)
For a more flexible, drag-and-drop collage:
a. Open the Freeform app on your iPhone.
b. Tap the pencil (Edit) icon to open a new canvas.
c. Tap + → Photos → select your images.
d. Drag and resize photos manually, using alignment guides.
e. Tap the two-square icon → select Hide Grid for a clean white background.
f. Take a screenshot and crop out the Freeform interface in Photos to save.
Tips for Making a Better Collage on iPhone
No matter which method you choose, these tips will help your collage look more professional:
1. Select a Theme
Stick to one theme. Vacation photos, family moments, product shots, food pictures, or a color scheme. A focused theme makes the collage visually appealing.
2. Keep a Balanced Layout
Avoid overcrowding. If you are using many photos, make sure they are evenly spaced.
3. Use Similar Filters
Consistent lighting and color tones create a cleaner aesthetic. Try applying the same filter to all photos before combining them.
4. Don’t Overuse Text
If you are adding text (especially on Instagram), keep it minimal and readable.
Conclusion
This guide has been updated for 2026 and covers methods that work on the latest iPhone models running iOS 18 and iOS 26.' at the end of the article's opening paragraph. Creating a collage on iPhone doesn’t have to feel complicated or limited. While built-in options like Shortcuts and Instagram Layout are helpful for quick designs, they only scratch the surface. If you want more control, better templates, and professional-level editing tools, Blend is here to take your collages to the next level.
Updated for iPhone 17 and iOS 18: All collage methods in this guide are fully compatible with iPhone 16, iPhone 17, and iOS 18. Apple has not added a dedicated collage tool to the Photos app in iOS 18, so the Shortcuts Photo Grid method remains the best free built-in option. Third-party apps including Canva, PicCollage, and Layout by Instagram are all updated for iOS 18.
FAQ
1. Does the iPhone Photos app have a built-in collage maker in 2026?
No, As of iOS 18 and iOS 26, Apple's Photos app does not include a dedicated collage feature. To create a collage on iPhone without extra downloads, use the free built-in Shortcuts app or Apple's Freeform app.
2. How do I put 3 pictures side by side on iPhone?
Open the Shortcuts app, tap Gallery, search for Photo Grid, and tap Add Shortcut. Run the shortcut, select your 3 photos, then tap Share and Save Image. The shortcut combines them into a side-by-side grid automatically.
3. Can you make a photo collage on iPhone without downloading an app?
Yes. The free Shortcuts app, pre-installed on iOS 13 and later, includes a Photo Grid shortcut. Open Shortcuts, tap Gallery, search Photo Grid, add it, then select 2 to 9 photos. It combines them automatically in seconds.
4. What is the Photo Grid shortcut on iPhone?
Photo Grid is a built-in Apple Shortcuts template that merges multiple photos into a single grid-style collage image without any third-party app. Find it under Shortcuts app > Gallery > search Photo Grid, then tap Add Shortcut.
5. Does the iPhone Photos app have a collage feature?
No, the native iOS Photos app does not include a collage maker as of iOS 18. The best built-in alternative is the free Photo Grid shortcut in the Shortcuts app, which requires no additional downloads.