

You can completely change how your image looks and feels with one simple edit: by adding a shadow. When you add shadow to image using AI, your subject instantly gains depth, realism, and a more professional finish. What once required advanced tools like Photoshop can now be done in seconds using AI-powered apps like Blend.
This guide walks you through exactly how to do it, step by step, while also helping you understand how to make your shadows look natural, not artificial. By the end, you won’t just know how to add a shadow and you will know how to make it look right.
Why You Should Add Shadow to Image
An image without a shadow often feels incomplete. Your subject looks like it’s floating, disconnected from the background. The moment you add a realistic shadow, everything changes. The entire visual sort of comes together and looks balanced.
This matters more than you might think, especially if you are creating:
- Product images for eCommerce
- Social media content
- YouTube thumbnails
- Personal branding visuals
AI apps like Blend make this process fast, but your adjustments make it believable.
Add Shadow to Image Using the Blend App: A Step-by-Step Guide
If you want to add shadow to your product images and boost sales online, here’s the exact workflow using the Blend app.
Step 1: Open the Blend App and Select “Add Shadow”

Start by opening the Blend app. On the home screen, look for the Shadows feature, with a caption “Apply 3D shadow to a 2D image.”
All you have to do is upload your image and tap on the Shadow option from the editing panel.
At this stage, your image should be ready for editing. If your subject isn’t isolated yet, you can quickly use the cutout feature before applying the shadow.
Step 2: Choose Shadow Direction (Right, Left, Center, Bottom)
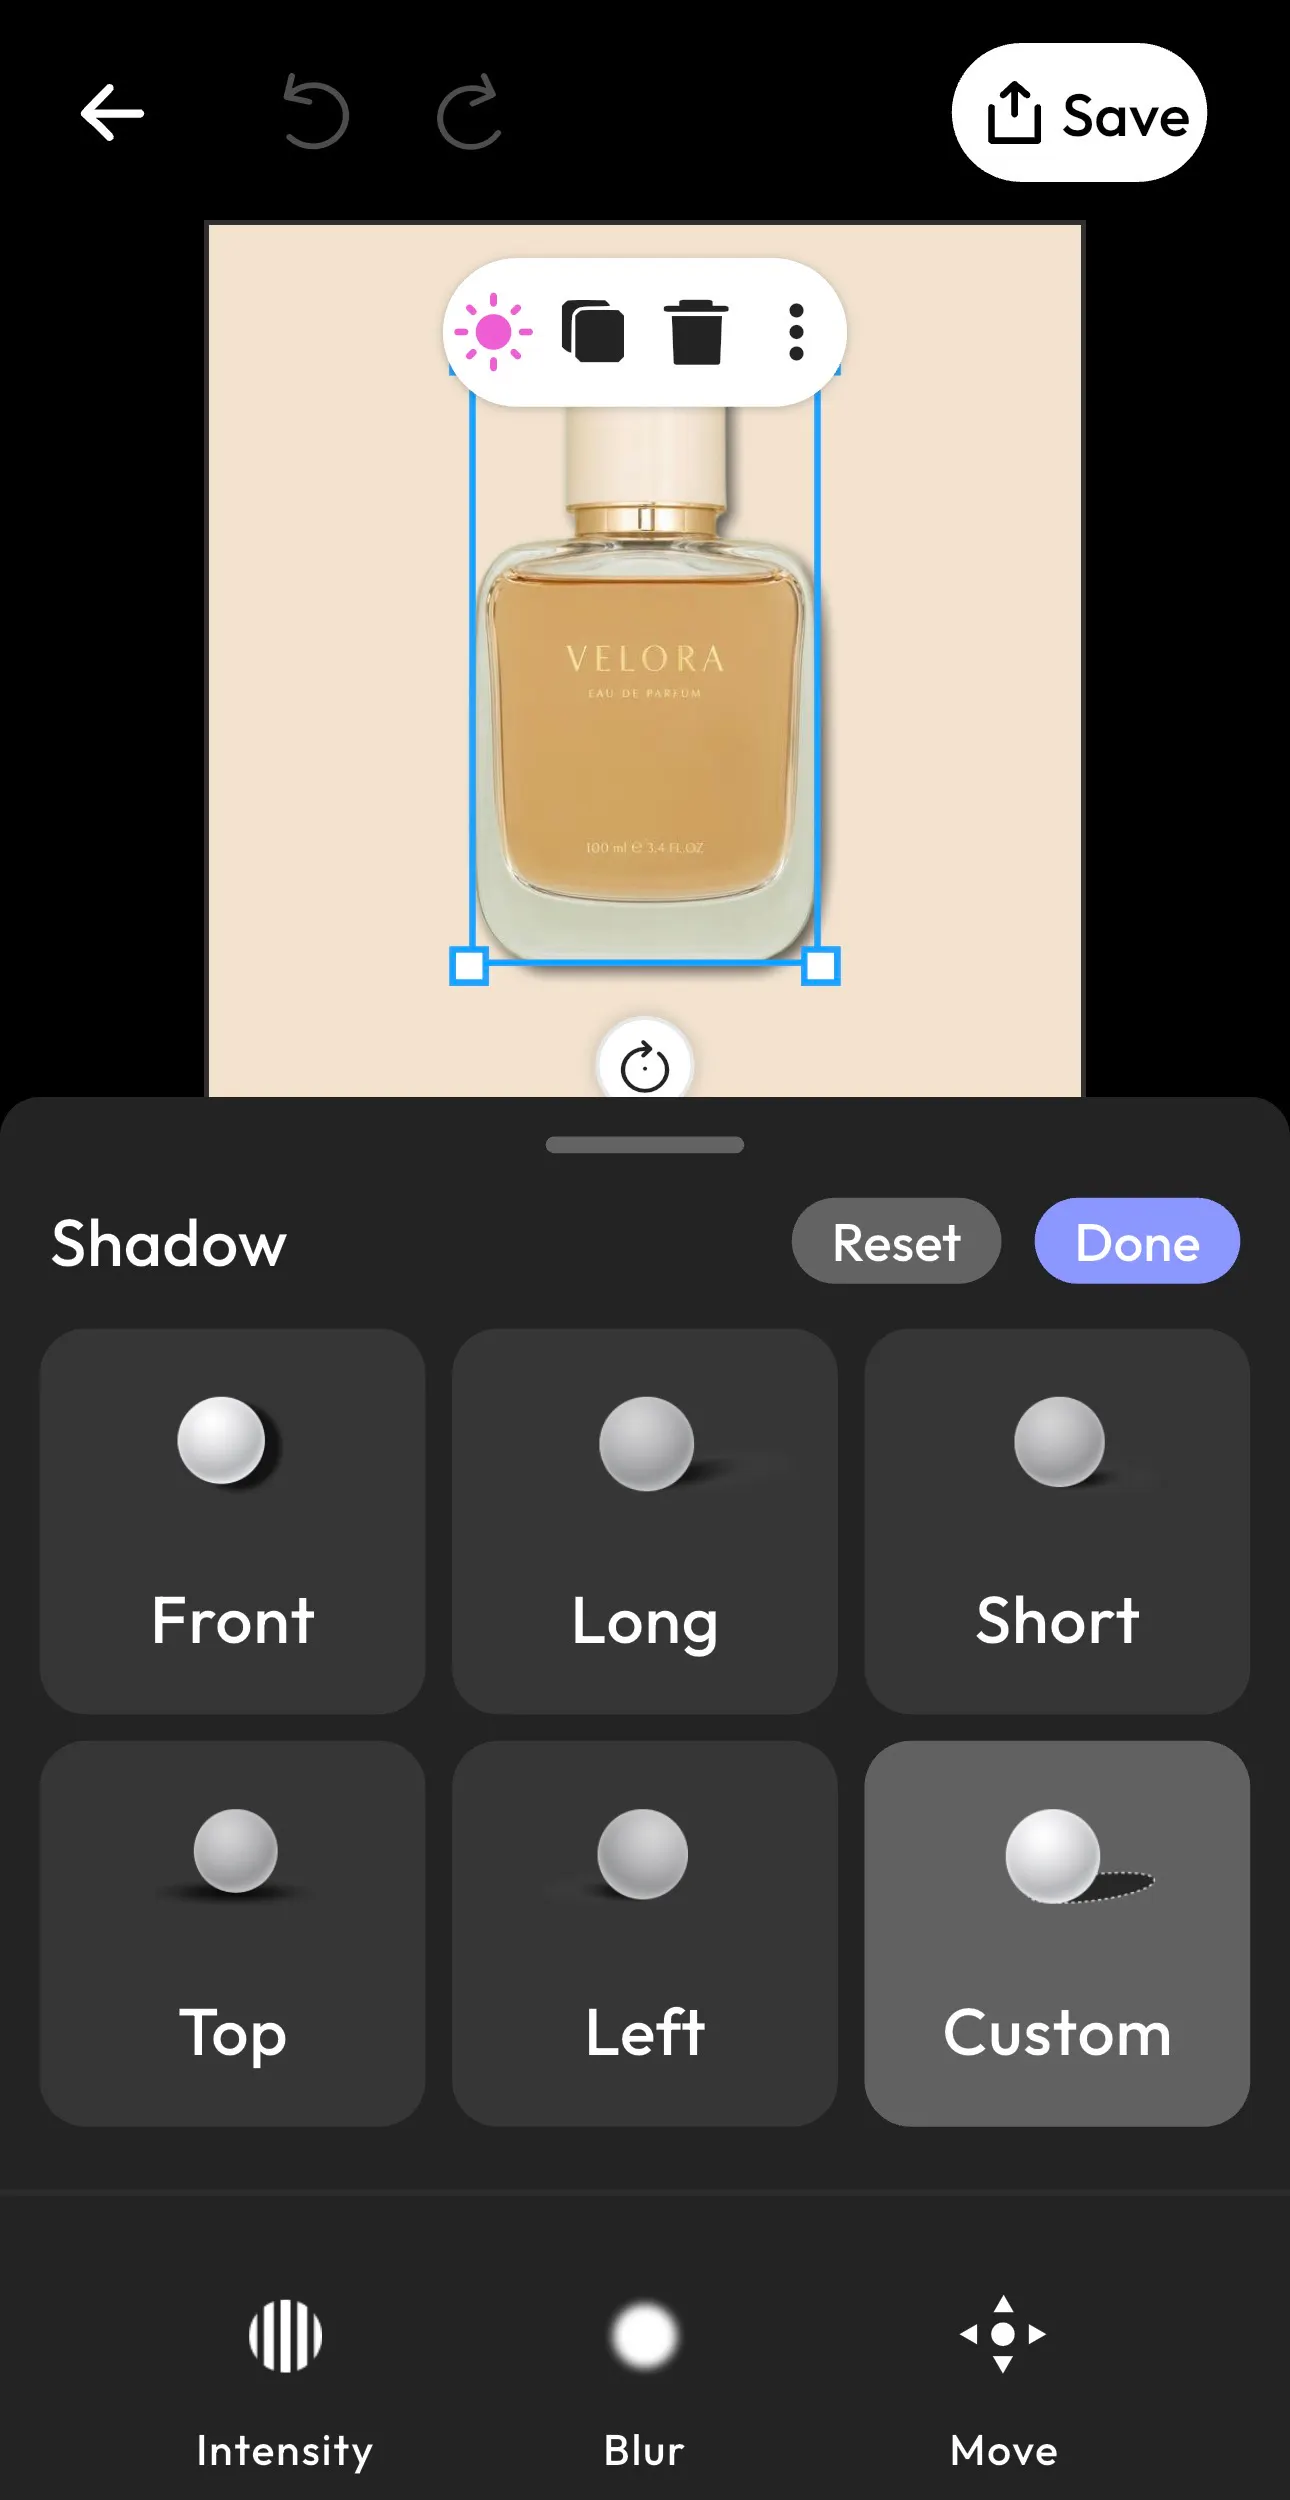
Once you enter the shadow tool, you’ll see multiple shadow styles and directions.
You can choose from:
- Left shadow
- Right shadow
- Center shadow
- Bottom shadow
- Additional presets like long, short, or custom
Each option changes how light interacts with your subject. This is where your image starts taking shape.
If your light source is coming from one side, your shadow should fall in the opposite direction. Matching this correctly is what makes your edit look realistic instead of edited.
Step 3: Customize Your Shadow (Blur, Intensity, Position)
This is the most important step if you want a professional result. Instead of leaving the default shadow, you refine it using built-in controls like:
- Intensity to control darkness
- Blur to soften edges
- Move to adjust placement
A realistic shadow is rarely harsh. You’ll usually want a soft blur with moderate intensity. If the shadow looks too strong, reduce it slightly until it blends naturally with the background.
This step is where AI gives you speed, but your eye gives the final polish.
Step 4: Use the “Move” Tool to Adjust Position
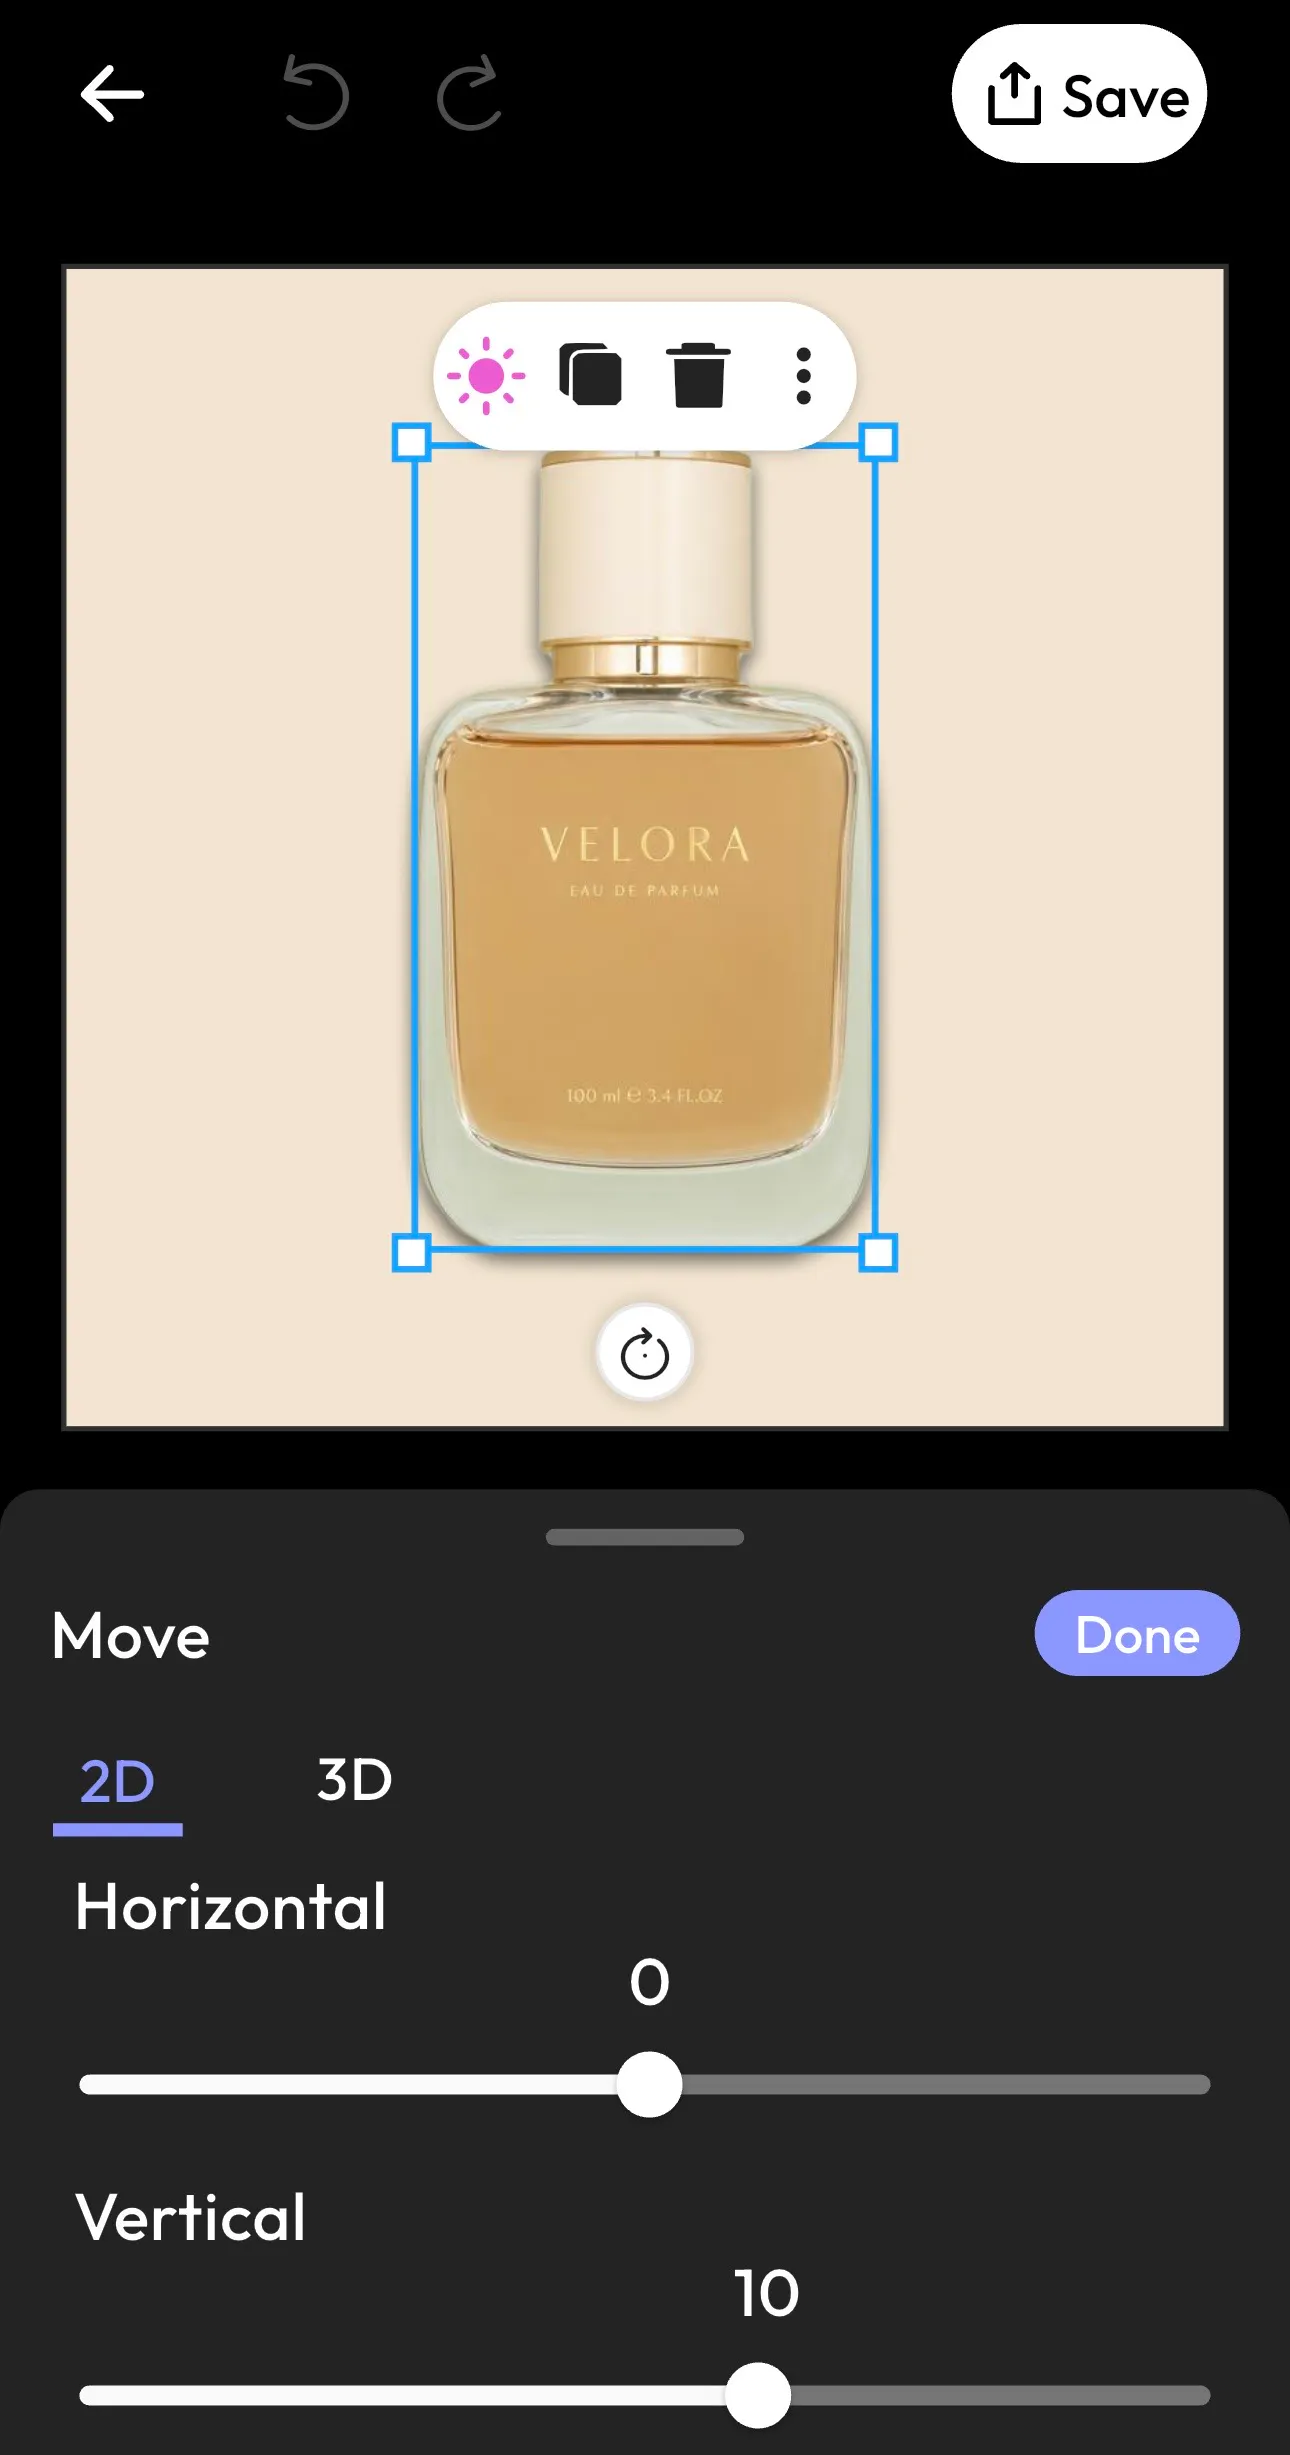
Once you are done customizing your image, use the “Move” option to control how your shadow sits relative to the subject. This is the step most people overlook but it makes a huge difference.
Here, you will see options like:
- Horizontal movement
- Vertical movement
- 2D or 3D positioning
This lets you fine-tune the placement so the shadow aligns perfectly with your subject and lighting direction.
For example, when you slightly lower the vertical position, it can make your object feel grounded, while adjusting horizontal movement helps match the light angle more precisely. This step is what transforms a “good” shadow into a realistic shadow effect.
Step 5: Save Your Final Image
Once you are satisfied with how the shadow looks, tap Done, then hit Save.
Your image is now ready to use for websites, social media, or product listings with a clean, professional look.

(Shadow generated using Blend)
Types of Shadows You Can Add Using AI
Not all shadows look the same. Understanding different styles helps you choose the right one for your image. Let’s take a look at the types of shadows you can add using AI:
- A soft shadow works best for minimal, clean designs. It’s subtle and often used in product photography.
- A long shadow adds drama and is commonly used in creative or stylized visuals.
- A drop shadow is the most common. It sits slightly behind the object and gives depth.
- A custom shadow allows you to fully control direction, blur, and distance, making it ideal for precise edits.
Choosing the right type depends on your image and the mood you want to create.
How to Make AI Shadows Look Realistic
Adding a shadow is easy, but you need to make it look real. This is where your skill comes in. Here’s how you can level up:
- Keep It Natural: Avoid extremely dark or sharp shadows unless the lighting demands it.
- Follow Light Logic: If the light is soft, your shadow should be soft too.
- Use Subtle Blur: Real shadows are rarely perfectly sharp.
- Match Perspective: The angle of the shadow should match the object’s orientation.
- Avoid Floating Objects: Always ensure the shadow connects visually to the subject.
Blend App vs Other AI Shadow Tools
The Blend app stands out because it simplifies the entire process without removing control. Unlike complex tools, it lets you:
- Add shadow to image in seconds
- Choose direction presets quickly
- Customize blur and intensity easily
- Work without design experience
Other tools may offer similar features, but Blend balances speed and usability especially well, which is why it’s popular for product photos and social content.
Conclusion
Some people don’t consider adding a shadow a big deal. But it’s more than just a minor edit. It has a major impact on how your image is perceived.
When you add shadow to image using AI, you are not just enhancing visuals, you are creating depth, realism, and a more polished final result. With tools like Blend, the process is simple, fast, and surprisingly powerful.